Thursday, May 16, 2019

Quick and easy thank you dahlia card

Hi everyone! I have a quick and easy card to share that I put together by using an image that I already had colored. It's been a few weeks since I've had the mojo to create AND I've been busy planting my garden and redoing our front yard. I needed something quick and easy to break my slump.
This came together rather quickly with a few die cuts, twine bow and some Nuvo drops!
The dahlia image is from the FSJ stamp set called Dahlia Burst. It remains one of my favorite FSJ floral sets. The strip of triangles is from the FSJ Fun Triangles die set. 
The thanks die cut is one of the new die sets I treated to myself with a couple weeks ago. It's from WPlus9 and is in the Welcome dies set. Love the font -this set has 3 words Welcome, Hello and Thanks -very versatile!!
Thanks for stopping by and have a great day!
Other supplies:
Copic markers
Black and White Twine (FSJ)
Nuvo drops in Pink Orchid

Thursday, April 11, 2019

Water colored Thanks card

Hi everyone! I have a fun card to share which uses the Crafter's Companion edge dies and some coloring with my Arteza Real Brush pens. I had quite a few colored images left over that I made a second "bonus" card!
The stamp set is one of my favorites from Fun Stampers Journey called Flower Swirls. I chose to color each bloom different colors and 3 different hues within those colors. I love how this turned out. 
Here's a different view so you can see how fun these edge dies are!
And here's the bonus card I made with the left over colored blooms using the Hugs word. I didn't use the edge die to cut into the card front on this one, it I used it as a layer and popped it up with some die cut fun foam.
The splatters in the background is from the brush pens as well. I just added some of the color to a squirt of water on my palette. The fabulous deep rich purple ribbon is from May Arts -the faux canvas in violet. LOVE the color so so so much. 

Thanks for stopping by and have a great day.
Other supplies used:
Cosmic Grape cardstock by Fun Stampers Journey
Silver pearls by Fun Stampers Journey
Swiss Dots embossing folder

Sunday, March 17, 2019

Ranunculus Thank you card

Hi everyone! I just can't get enough of this amazing image from WPlus9! This time I colored the ranunculus flowers with pale to medium pink copic markers. So so pretty!
The image is part of their Beautiful Boquet line which I love and plan to get some more. They are a smaller stamp set with a flower cluster and sentiment and more affordable as well. I used one of the word dies from Fun Stampers Journey and heat embossed 1/2 the sentiment from the set.
I added some bright blue sequins to pull in the tiny blue colored flowers and added some 1/8" washi tape from my stash.  Mood when done - happy!!
Thanks for stopping by and have a great day!

Tuesday, March 5, 2019

Copic and Arteza brush pens, one image colored 2 ways

Hi everyone! My coloring journey continues. I bought this amazing stamp by Picket Fence Studios which is part of their Beautiful Girls line, this one is Jordan and I am in love. She is just beautiful. I see many more of these beauties in my future.

I wanted to practice my coloring skills with skin and hair using both Copics and my Arteza Brush pens. I thought it would be fun to make identical cards one colored with each method. Here's how they turned out.
This was my first time at coloring a person (and a rather large area of the shirt) using my Arteza brush pens. I really love this look! Water coloring is tricky and I plan on taking an online class to help me improve. After I finish my Copic class that is which I'm only 1/2 way through! I keep getting sidetracked, lol. I'm sure many crafters can relate!
Here is a closer look at the water colored image. I heat embossed her in black first to help my coloring stay in the lines. When I get a bit better I plan on trying to water color without embossing and then the no-line method!
Here is a closer look at the copic colored image. I am more practiced with Copics and like how this turned out even without getting through the skin and hair section which is up next!
Thanks for stopping by and have a great day!
Other supplies used:
Fun Stampers Journey - Black sparkle silk, Film Frame die set, Text Happy stamp set
Wild Orchid Crafts - ivory open roses 10mm
May Arts - silver metallic string
2mm black rhinestones
PaperTrey cardstock Aqua Mist and Hawaiian Shores

Friday, September 14, 2018

September Crush on Color

Hi everyone! All throughout the month of September, FSJ is having a sale on their cardstock, inks and even have weekly special color family BUNDLES! Bundles are special assortments of items within a color family and are good for 1 week only. You can check out the FSJ Website for all the Color Crush savings and bundle information.

I made a couple cards using 2 color families and combined them with my favorite thing...flower dies! I had so much fun playing around with these. First up:

THE GOOD LIFE

handmade card using Fun Stampers Journey hexagon and flower dies #funstampersjourney #papercrafts
I used a combination of flower dies and a paper flower. I used the Cottage Bloom and host exclusive Bold Bloom dies. The branch sprig is the Bloom Cluster die and I used some of the Good Life pearls and a Tin Pail flower from the Cottage Flowers pack.

Party Pop
 Keeping the same Hexagon shape, this card uses the Clover Bloom and Cottage Bloom dies along with the Spiral Lines die to make the Grape Fusion flower. You may have noticed the white 1/2 hexagon piece is embossed with the Bloom Benefit Tiny Dot folder. The Good Life card above uses the Beach Towel embossing folder.

Thanks for stopping by and have a great weekend!

Thursday, September 6, 2018

It's a Boy!

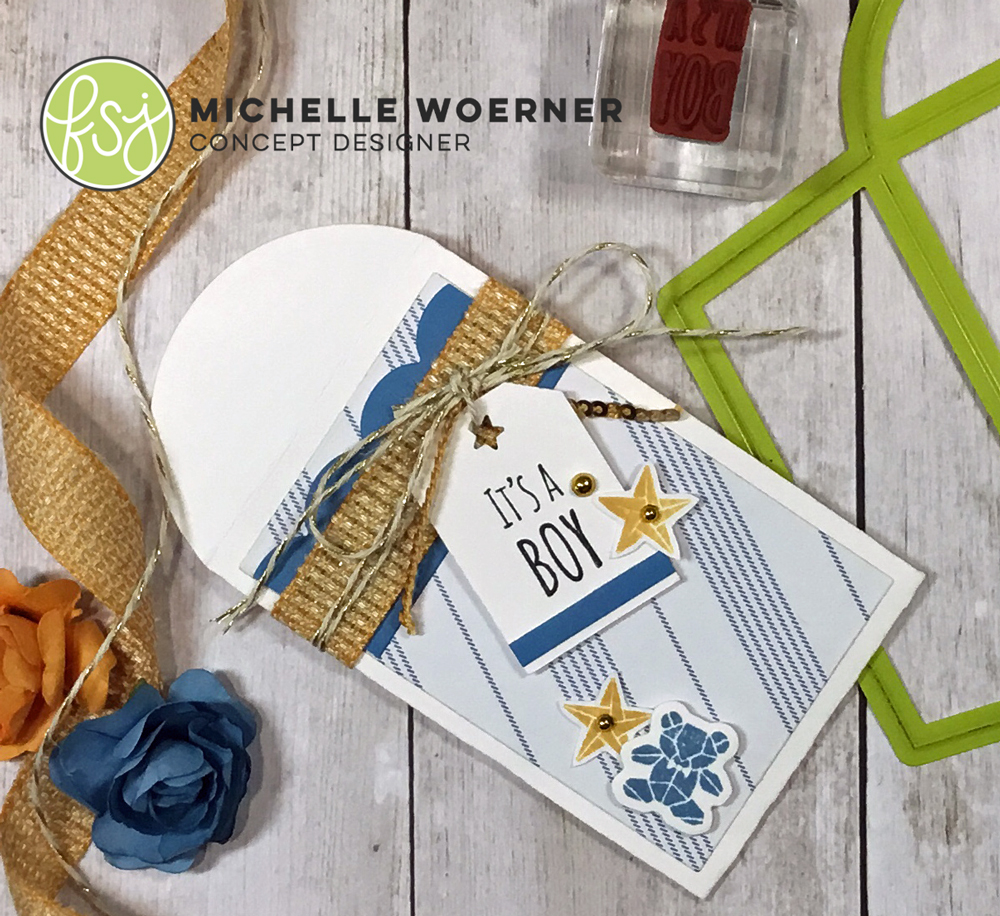
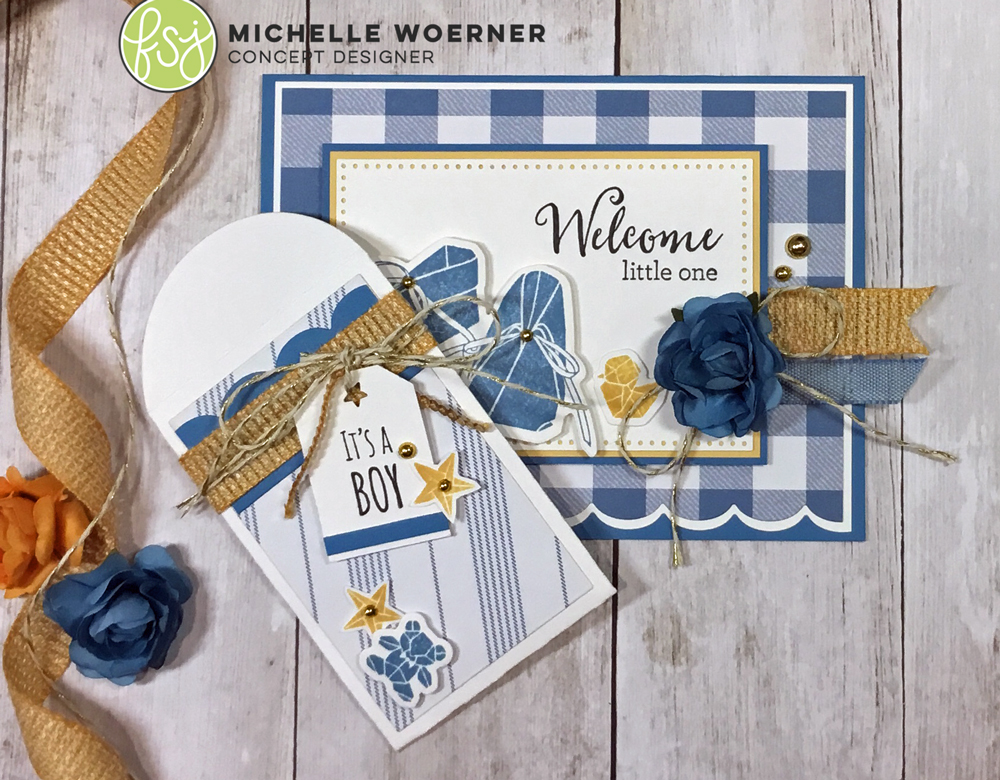
Hi everyone!  Since Bill and I both turned 50 this year I kinda figured my making Welcome Baby cards were a thing of the past (for an actual baby, not just for my job), but NO! One of Bill's co-workers is expecting a boy at the end of the month and I am so excited to make a baby card for her!
I used the new stamp set Pitter Patter and combined it with a few items from The Good Life collection.  I used two of the new ribbons Sweet Haystack and Cotton Chambray Shirt. I love that both have some texture to them! And of course, what baby card is complete without some flowers! I used the blue one from the Meadow Flowers pack.

We were on vacation during her baby shower, so at this point we thought a gift card was the way to go. Now they can get whatever they still need for their baby boy, so I made a coordinating gift card holder with our die Gift Card Sleeve die.
I made the sentiment tag from our Tag Time Punch and used the Star Punch to make the opening at the top. So fun!!
Thanks for stopping by and have a great day!!
P.S. If you want more information on how to use the Gift Card Sleeve die, check out the Product Spotlight video I did for it.

All products used are Fun Stampers Journey.


Friday, August 10, 2018

Quick and easy cards -wedding and baby

Hi everyone! I have an easy and versatile card layout to share today. This one is simple and I think has the right amount of texture and fun!

My first card is a wedding card using the new stamp set, Happy Wedding Day (can I say this set makes me happy!). I kept the colors monochromatic using white and the new Peaches and Cream color. I die cut 3 squares, layered them up and adhered over a panel embossed with the new Tiny Dot Embossing Folder (my absolute favorite new thing from the new catalog!!). Easy peasy and cute.

My next card is a baby card using the new set, Pitter Patter. This one is monochromatic using white with the Fresh Sage color. I just LOVE our new colors! And as I was editing this blog post I realized the Peach and Sage colors are the colors of my blog design. So I clearly have favorites!! lol!
Do you have a go-to layout for quick and easy cards? Let me know and share! Thanks for stopping by and have a great day. Here is a close up picture.

Thursday, July 12, 2018

Color burst pencil combos to match new FSJ colors

Hi everyone! I mentioned yesterday that I was working on pencil color combinations for our 6 new colors. Well, I figured them out and think they are a pretty close match. These color combos are for the Color Burst Pencils. I imagine they would be similar with the Color Splash pencils, but I have not tested those.  Before I get to the colors, I want to share a few tips I came up with while I was tinkering around.

Tips for blending multiple colors: 
1. When you lay down the color, try to lay it evenly without sharp lines. Sharp lines can be hard to blend. Try "dulling" the tip of the pencil on a scratch paper to minimize sharp lines.

2. If you DO end up with some thick or sharper lines, take a white eraser to them to lighten them up and start again. Try to get the color even before you add your next color.

3. If you like to blend your pencil colors using stumps with baby oil or Gamsol, keep in mind the last color laid down will be the first to come up with blending. After you blend, go ahead and add another layer of whatever color you added last.

4. The order of the pencil colors do matter. But for fun try switching them up, you will get different hues and be used when making shadowing/shading your images.

Disclaimer: I am not a professional colorer (is there such a thing? lol). I know many of my readers are way more experienced in coloring, so I would love it if you have additional tips to share! Leave me a comment below for all to see.

--Chambray Shirt--
--Rustic Rose--
--Haystack--
--Fresh Sage--
--Tin Pail--
--Peaches and Cream--
Thanks for stopping by! I hope this was helpful.

Wednesday, July 11, 2018

FSJ Catalog Launch Party

Hi everyone! We've been celebrating our new 2018-2018 Catalog with a fun Launch Party!! You can view the entire catalog online HERE.  All week there have been blog post inspiration and Instagram giveaways. Be sure to follow FSJ on Instagram for details on our new giveaway. You can win an FSJ gift card!

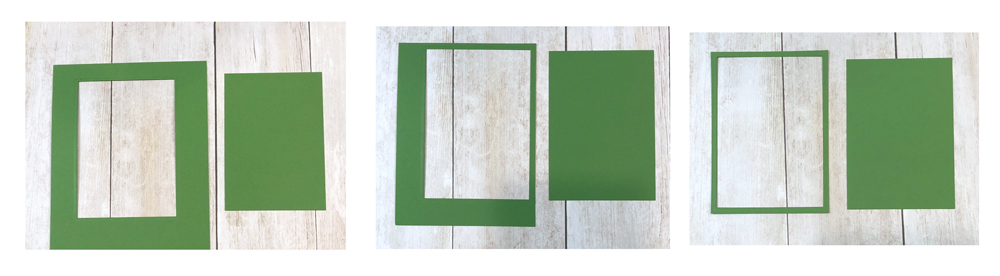
It was sooooo hard to chose what my very first card would be out of all the new amazing goodness! I ended up picking one of the new Blooms sets called Handpicked For You. I love everything about this set- the images, sentiments and the little tag! I colored it with the Color burst Pencils and framed it with a Kiwi Slice frame. To make the frame that thin, I die cut a rectangle and then used the outside/negative piece and trimmed a small frame from that (see below). Using this technique you can control the thickness of the frame.
The sentiments were heat embossed with white embossing powder. I love the way that makes it pop. The patterned paper is from the new RSVP Prints collection. Peeking out from underneath the paper panels is our new Rustic Rose satin ribbon. Oh yes, we launched NEW ribbons -5 of them!

Here's 2 easy steps how I made the frame using 1 rectangle die:
STEP 1: Die cut rectangle making sure to leave enough cardstock on all sides for your frame.
STEP 2: Make 4 cuts trimming the cardstock on all sides leaving your frame.

Thanks for stopping by! Here's a close up picture. I'm working on the pencil combinations for all 6 of our new colors. The combination I used to get the Rustic Rose color is: 29+5+9 in that order. Stay tuned for a blog post tutorial for all 6 and some tips.

All products used are Fun Stampers Journey. A reminder you need to order FSJ products through a Journey Coach. I am not a Coach. You can find a coach near you on the FSJ website in their Find A Coach tab.

Monday, February 19, 2018

Water color striped background

Hi everyone! Today I played in the Splitcoast Stampers CAS challenge. This challenge was to make the focus of your card the background!  I thought this was a fun idea, so I played along.  I've seen this technique on Pinterest several times and thought it was really pretty. It only took me 2 tries, which for a watercolor background is not bad my friend. Not bad at all! lol!

We have SO MANY amazing flower stamps that it's hard to give each it's due. For this card I went with the Dahlia Burst stamp set as I think I've used it maybe once! That's just not right I tell ya. And I thought it looked pretty left black and white and it helped make the background really pop.
Here is how I started the process. I know most people probably free hand coloring the stripes, but I don't play that way. So I used some washi tape to make the stripes. It worked out great as there was just enough color that seeped under the edges to give it a natural look.
The pencils I used are 33, 34, and 36.
To color the stripes I laid down the color from the pencil directly to the Color Splash watercolor paper. I then swirled/spread the color with the large size of our Journey Blending Brush. I tried to use the small and medium sizes, but the large worked the best for this size of coloring.

Thanks for stopping by and have a great day!

All products used are Fun Stampers Journey.

Tuesday, December 19, 2017

Peppermint bark popcorn treat gifts

Hi everyone! First, I want to wish you all a very merry Christmas and let you all know much I appreciate you following my blog!! Thank you.
So, every year I make a double batch of Peppermint Bark Popcorn and give it out to all my neighbors. In looking at the date I printed out the recipe, it looks like I've been doing this since 2008! Wow, time has flown by! I love this tradition.

So this year it dawned on me, WHY NOT USE OUR POPCORN BOX DIE? I mean really? Why hadn't I thought of this before? Duh! LOL! So this year I busted it out and went to work.

I used a lots of little goodies to tie up and decorate my boxes and tags. Too many too mention, but the main things are the Popcorn Box Steel Rule die, Poinsettia Steel Rule die and the Tag Time punch So here's what I came up with so far. I've made 2 boxes and I have 8 more to go!! 

Like many of you, I have a condition called Can Never Make The Same Thing Twice-itus, so all my tags, ribbons and popcorn boxes are and will be different. Here is the first style:
Second Style:

...and here is what I have left to do. Wish me luck!
Thanks for stopping by and once again I wish you and yours a very merry Christmas!

All supplies used are Fun Stampers Journey.

Monday, December 11, 2017

Black and White Christmas card

Hi everyone! It's been awhile since I posted. For several weeks I was busy preparing for my trip to Phoenix to the FSJ Journey Station. While I was there, I filmed 13 videos (Product Spotlight videos on our dies, so keep an eye out for them)!! And helped prepare and participated in the FSJ Presents event! It was an amazing trip! I'm back now and after a few days off to put up my Christmas tree and decorations, I am back to work.

To help with my slow mojo, I played along with the current Splitcoast Sketch Challenge #674. It was a fun traditional sketch and I decided to use some of the black and white Christmas paper from the Christmas Cheer Prints pack and made a (nearly) black and white card. It was out of the norm for me and I am still not sure how much I like it. But here it is...
I lightly colored the lovely shopping lady image from the Merry Melody stamp set using the Journey Color Burst Pencils. I get asked a lot how I blend my colors, I use the Color Burst Blenders with some generic baby oil and it blends beautifully! My white background panel is embossed with the Love Stripes folder.

Thanks for stopping by and have a great day! Here's a close up picture.
All products used are Fun Stampers Journey.

Friday, November 24, 2017

FSJ Concept Designers Gel Press Print Swap

Hi everyone and welcome to a fun blog hop! The FSJ Concept Designers have been having a little fun and today we want to show you what we've been working on. We thought it would be cool to do a print swap. The six of us divided up into pairs. Three of the designers created an 8.5x11" print on the Journey Gel Press. Then they cut their print in half and sent half to their partner. Each partner created a card using that print, and today we're going to share what we've created! It was a really fun swap and I can't wait to see all three of the prints, and how each designer used their print on a project!

My partner for the swap is Mariana.  Mariana created a really pretty print using oranges, cream and and Sweet Pear. She added some embossing paste with my favorite stencil, Circle Bliss.  It is absolutely gorgeous!
She mailed me this half of the print:
And here is what I made:
 I used one of our Foiled Frames and 2 of the Vintage Burst flowers and leaves. The sentiment is from the Must Have Sentiments set and I embossed in gold.  I wanted to keep things pretty simple and kept the frame open to allow the print to shine.  Be sure to head over to Mariana's blog and see what she created with the other half of this print!

Check out the rest of the teams, see the prints they created and how they each used them! 

Shannon and Tania

Thanks so much for stopping by today! Enjoy the rest of the swap stops, and don't forget to pin everyone's projects for inspiration later on!
All products used are Fun Stampers Journey.

Thursday, October 19, 2017

Golden Reindeer Christmas card

Hi everyone! I have a Christmas ensemble to share with you today. I just love making elegant Christmas cards. I'm happy with cutsie too, but elegant wins my heart every time! 
The reindeer is from the ATS Blitzen (and it has a matching die) and I embossed it with Gold Powder. I accented his elegant antler swirls with some red stars from the Star-fetti jar as well as red flower pieces from the Journey Sequins Holiday Elements jar. I also used one of the gorgeous  poinsettia flowers from the Holiday mini catalog, Golden Poinsettia, which comes in a pack of 6.  I made a frame from the Gold Mirror cardstock -which I love to use on holiday cards!! So shiny and pretty!
Did you notice the sentiment? Yes, it's in Spanish! This year FSJ launched several Spanish sentiment sets! I used a sentiment from Feliz Navidad ATS.

I also made a little tag! The tags are from the Steel Rule die called Tag Set, I used the largest of 3 sizes. I added some of my much neglected Mini Jingles bells to the center of the Poinettia.  The strips of patterned paper are from the Christmas Cheer Prints pack. The sentiment is also from the Fleiz Navidad ATS.
Thanks for stopping by and have a great day!

All supplies used are Fun Stampers Journey.

Saturday, October 7, 2017

World Cardmaking Day Be Brave challenge

Hi everyone! Happy World Cardmaking day!! Today Fun Stampers Journey is hosting a few challenges in coordination with our annual Be Brave card drive in honor of Breast Cancer Awareness month. I am playing in Challenge #2 which is to use ribbon in a different or unique way.
What I've done with my card is "colored" my organdy ribbon. By trimming any color of cardstock into thin strips and covering them with our Whip Cream Special Day Organza ribbon, you can give the illusion of any color of ribbon!  Kinda fun and simple. The stamp set I used is called Be Brave and I accented the ribbon image with one of the resin flowers from the Decor Blooms pack.

A bit more information on the card drive:
 We are calling on all of you! Create a handmade inspiration card and send it to the Journey Station using your unique designs. We’ll send them to a Breast Cancer non-profit organization to give these encouraging messages to patients in need.
Last year, we received about 475 cards. This year, the goal is to get at least 500!

You can find more information about the card challenges on the FSJ Facebook page through out the day! 

My fellow Concept Designers Patricia Roebuck and Tania Willis are also playing in this challenge, hop on over to their blogs to see what they did with ribbons!
All supplies used are Fun Stampers Journey.


Thursday, October 5, 2017

Silver and gold Christmas doves

Hi everyone! I have another Christmas card to share. I played along with this week's Sketch Challenge on Splitcoast Stampers. You know for YEARS, I played along with the sketch challenge every single week. I've just recently started it back up again and I'm really enjoying it. 
My card uses the Winter Doves stamp set for the doves and swirls, the sentiment comes from the Snowmen Days set.  I don't usually mix silver and gold, but I tried it with this card and I think it turned out pretty!  It doesn't photograph well, but I used the silver mirror cardstock behind the white pieces and it looks so pretty with all the silver and gold embossing!  The embellishments I used are the Fashion Silver pearls (a FAV of mine) and one Golden Poinsettia.

If you want to play along in the sketch challenge and show off your favorite stamps, you can find the SC665 details here.

Thanks for stopping by and have a great day!
All products used are Fun Stampers Journey.