Thursday, December 3, 2015

Holiday table ensemble

Hi everyone!!  I have a fun table setting ensemble to share today.  Yes, I made this with a Thanksgiving theme and I'm a bit late posting this.  But you can just as easily change up the patterned paper and die cut shapes and it would be darling done with a Christmas theme!

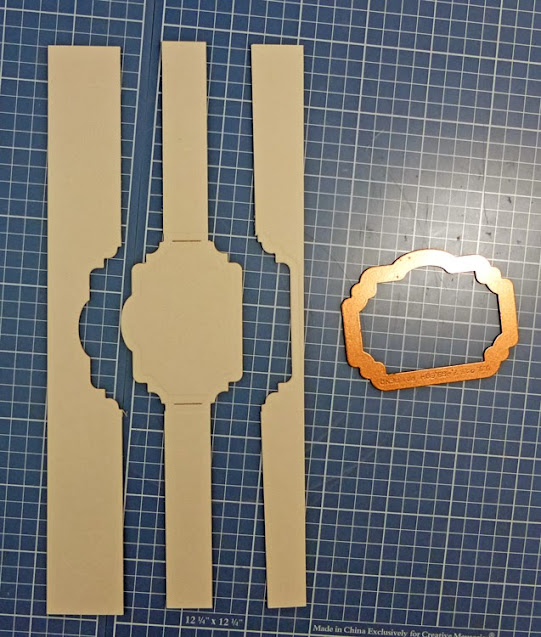
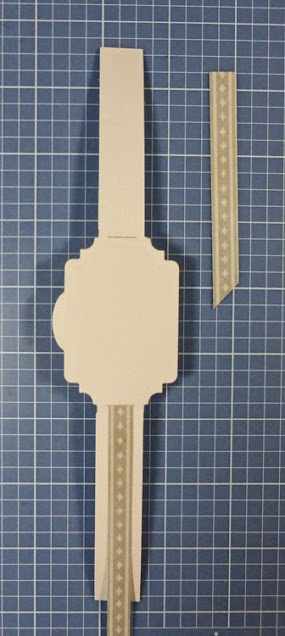
First up is a silverware holder.  I made this using the Tagged Pocket Die.  Since it's a bit short to hold standard silverware in the pocket, I made several layers and adhered them to the back.

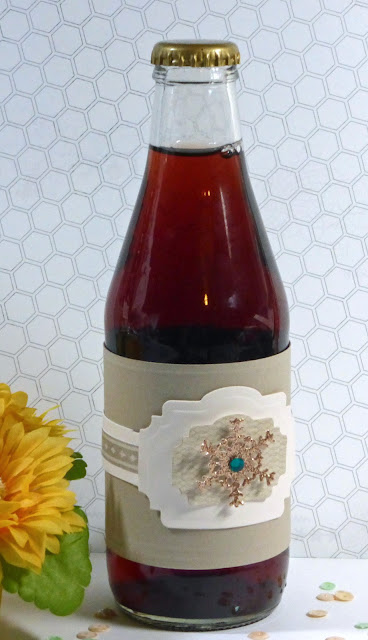
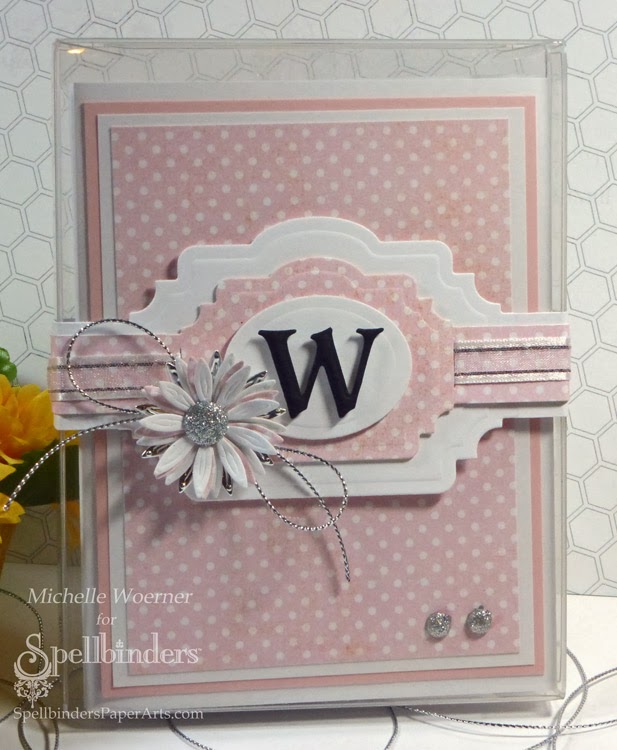
Next up is a fun way for a table placement.  I stamped out an initial from the Type Block ATC set and adhered it to a stamped and die cut label shape from the Give Thanks stamp set.
Lastly a fun napkin ring.  I stamped and die cut a few leaves from the Give Thanks stamp set and clipped them on with a jumbo wooden clothespin.
Thanks for stopping by and have a great day!
Ensemble details, all supplies are Fun Stamper Journey:


-Napkin Holder-
Give Thanks Stamp Set SS-0024
Thanksgiving Die Set DI-0024
Tagged Pocket Die Set DI-0001
Buttercream Cardstock CS-0040
Pumpkin Bread Cardstock CS-0098
Oatmeal Cookie Cardstock CS-0023
Hazelnut Blend Cardstock CS-0013
Harvest Days Prints PP-0017
Cocoa Powder Ink IP-0016
Journey Sequins Celebrations AC-0115
Natural Twine AC-0005
-Napkin Ring-
Give Thanks Stamp Set SS-0024
Thanksgiving Die Set DI-0024
Oatmeal Cookie Cardstock CS-0023
Pumpkin Bread Cardstock CS-0098
Hazelnut Blend Cardstock CS-0013
Cocoa Powder Ink IP-0016
Pumpkin Bread Ink IP-0057
Natural Twine AC-0005
Jumbo Wooden Clothespins AC-0028
-Pumpkin Name Holder-
Type Block AT-0131
Give Thanks Stamp Set SS-0024
Thanksgiving Die Set DI-0024
Buttercream Cardstock CS-0040
Cocoa Powder Ink IP-0016
Wooden Accents AC-0031
Natural Twine AC-0005
Photo Pin Elements AC-0103
Cocoa Powder Gingham Ribbon AC-0110
Journey Sequins Celebrations AC-0115
Photobucket

Friday, September 12, 2014

Are you a Pinterest mom?

Hi everyone!  Are you a Pinterest mom?  You know, someone who goes all out with the fabulous party favors, gift baskets, party decorations and back to school gifts?  Well, I want to be... dream to be... but am I?

This year was my first year making Back to School gifts.  Yes, my boys are going into the 5th and 3rd grade, it's about time I know!  I've been collecting some small items for a "Teacher Survival Kit" theme over the last few months (some snacks, chocolate, Advil, make up, nail polish and files), so I thought I was totally on track with being a successful Pinterest mom!
However, it occurred to me yesterday afternoon as I was RUSHING to put together the baskets at the last minute that, sadly, I'm not.  Good grief, where does the time go?  I waited to the last day, went back and forth on what to do, and my trip to the Dollar store for a cute basket or bowl/tin failed and I ended up with "boat" shaped baskets.  They are cute, just not what I had in mind.
So you ready?  Here's how they turned out.  Don't judge!  lol!
 Initially I wanted to make a cute banner lavishly stretching from end to end, but since it was 3:30 and I had literally less than an hour to finish up, that went out the window.  I switched it up to a "stick" tag after remembering the new Build-a-Tag One die set from the Celebra'tions line.
SAVED!
This tag has cute brackets cut into the tag allowing it to slide over a stick or in my case, a paper straw.  They are just adorable and were so quick and easy. 
 
I accented my tags with a rosette and pierced circles.  I love the rosette dies because they have the scored lines right there for you!  Super fast and easy to make!  Each rosette requires 2 die cuts, when they are folded each make 1/2 the bloom.  A tip when assembling the rosettes is to start one with the fold UP and the next with the fold DOWN.  This will allow them to nest perfectly when gluing together.
Thanks for stopping by and have a great weekend!!  Here is a close up pic of the tags.
Card Deets:  
Spellbinders Supplies:  Build-a-Tag One die set (SCD-010), Pierced Circles die set (SCD-009), Rosette Blooms die set (SCD-011)
; Pattern Paper in Celebrations Print double sided pattern paper (SCP-016); Linen Thread (SCT-001)
Other Supplies: 
Sequins, buttons, rhinestones, paper straws and Brother P-Touch label maker 
Adhesive: Tombow USA Mono Multi liquid glue; Scrapbook Adhesives by 3L Foam Squares
NOTE: You can also find Spellbinders Celebra'tions line at the The Stamp Simply Ribbon Store.

Photobucket

Wednesday, January 8, 2014

Belly Band gift set tutorial

Hi everyone!  Welcome to Day 4 of the Spellbinders Paper Arts Diamond Anniversary Sneak Peek and Giveaway.  I am excited to show you one of the new die templates being released at the
Winter 2014 Craft and Hobby Association trade show! 
The die set I'm working with today is the S5-212 Belly Band One!

Supply List for Gift Card ensemble:
 S5-212Belly Band One
 S5-185 2013 Snowflake Pendant

Tutorial how I made the belly bands for the bottle and gift card holder:
1.  Trim cardstock to 8 1/2" x 2 1/2"
2.  Tape die down with the bottom line of the die parallel to the bottom edge.  For this layer, I used Belly Band Die #2 (with #1 being the smallest).
This is what it will look at once it's cut and embossed.  You'll notice the left and right sides are open ended.  This allows you to trim your "band" any length you want.
3.  To make the band cuts, I put the cardstock in my trimmer and lined it up to the die cut lines.  You could also do this step freehand or even with decorative scissors.
This is what it will look like after all four cuts are made.
 4.  Next I trimmed 2 pattern paper pieces and slipped them inside the pre-cut openings.  Note, you can also use ribbon as I have shown on my second project below.
5.  Once the accent paper is in place, I taped the ends down in the back.  Then I wrapped the entire band around my bottle/gift card holder, trimmed any excess and glued the ends together.
Here's a close up picture of the bottle.  For the second layer, I die cut and embossed pattern paper with Die #1 and turned it into a nesting label shape instead of a band by cutting the sides.


Here's a quick tutorial on how I made the gift cardholder:
1. Trim cardstock 8 3/4" by 4 1/4"
2.  Score lines at the 3" and 6" marks
3. For the diagonal opening, trim off the top right corner.  I made my cut marks 1/2" in from the left at the top and 1" up from the bottom.
4.  Add adhesive along the bottom and up the short side (I used 1/8" Scor-Tape).  This will allow a gift card to fit inside.
 Here's a picture of the ensemble with the belly band slipped off.

Here is another project I made with the Belly Band One die templates.  I decorated a clear stationery box with two nesting bands with the top layer threaded with ribbon.  I accented the layers with an oval from Classic Ovals SM, a letter from the Font One Uppercase, and flowers from the Blooms Four set.
Thank you for stopping by and have a great day!

Saturday, April 20, 2013

Spellbinders Savvy Saturday video

Hi everyone!  Well, I did it.  I made my very first video!  I am pretty happy with it, but I realize there will be a learning curve here.  There are some choppy transitions and I won't tell you how many days of prep and video takes it took to make this.  I know it will get easier with time, after all when I first started making scrapbook pages it took me 3 days to do 1!

So, I invite you to watch it and let me know what you think.  You can access the video here on the Spellbinders blog post.
 Here is a peek at my project.
Thanks everyone and have a great day.

P.S. this is 1 of 2 blog posts today.  Stay tuned for my post showing the remaining cards from the CAS-ual Friday Stamps April release!
Photobucket

Friday, November 23, 2012

Altered trinket box

Hi everyone!  I have a fun Mixed Media Spellbinders project to share today.  This one is a bit outside the box for me (haha).  You can find this and many other inspirational Spellbinders creations in their Idea Gallery!

I started with a wooden trinket box measuring 5¾ x 3¾ x 4".  I covered each side of the box with white linen paper.  I then added some pattern paper from FabScraps.  For the top of the bos, I layered roses from Rose Creations dies spritzed with Glimmer Mist.  I nested Standard Circles SM and Venetian Motifs dies in Silver Premium Craft Foil to create an open frame and accents from Venetian Motifs to add around the flowers. The words are from Girlie Grunge Labels sponged with gold ink.
The front uses a cut/embossed Grand Decorative Ovals One with the excess trimmed off.  And the finishing touches are a button, more Want2Scrap pearls and an accent piece from Venetian Motifs.
 This project was definitely a labor or love.  It took me a LONG time (read 2 days) to work out the details on this, but I love the final result and it was well worth it!  Thanks for stopping by and here is a close up picture of the roses and flourishes details.

Spellbinders Supplies:
Preferred Partner Products:
  • Want2Scrap, Say It With Pearls 72 Count LeCreme Pearls, Finesse Swirls LeCreme Pearls
Cross Promotional Partner Products:
  • FabScraps, Heritage Small Floral, Heritage Script 4 Patterned Paper
  • Clearsnap, ColorBox Gold Brocade Pigment Ink
  • Tattered Angels, Dazzling Diamonds Glimmer Mist
  • Walnut Hollow, Basswood Recipe Box
  • Scor-Pal, ¼" Scor-Tape
  • Beacon Adhesives, Zip Dry Glue
Other Supplies:
White Linen Weave Cardstock; Ivory Craft Paint; Ivory Brocade Trim; Vintage Button
Photobucket

Monday, October 22, 2012

Paper Christmas ornament

**UPDATE: This 10 year old post is getting traction. This die set has long been discontinued!
You can find similar die sets I used:
Spellbinders Store:
In stock Snowflake die sets
 
Scrapbook.com Store:
In Stock Snowflake die sets 
My project uses discontinued Ornament dies and it was pretty easy to make.  To make the outer "ring" part, I nested and cut two Ornaments dies - die #5 and die #4 (die #1 being the smallest). I then folded each in the middle and then adhered one side to another until it made the whole ornament -the outer ornament uses 6 pieces.
The center ornament was made the same way and also uses 6 pieces.  To decorate it, I die cut glitter cardstock with a snowflake die, cut them randomly and adhered.  I also added a bead of stickles along each outer ornament "ring" for extra sparkle.

I don't have any step shots of this ornament, but I took some from a similar project that shows how it's done.  These pictures are from an ornament that I used on a scrapbook page, so it was flat on the back and not circular like above, but you get the idea.

First you score the ornament in half.
 Then you assemble assemble how many you want together and glue the sides together.
 After gluing the sides together, you can decorate any way you want.  On the ornament above, I randomly placed snowflakes and trimmed off the excess.
 After you decorate your hat pin the way you want, you can adhere it to the inside of the ornament by wrapping it with Scor-Tape and squeezing it tightly.
**UPDATE: This 10 year old post is getting traction. This die set has long been discontinued!
 
You can find similar die sets I used:
Spellbinders Store:
In stock Snowflake die sets
 
Scrapbook.com Store:
In Stock Snowflake die sets 
 
I hope these gave you a visual on how to make these.  They are pretty easy to make and you can make new ones every time you change the color scheme of your tree!
Thanks for stopping by and have a great Monday!! 

Wednesday, October 10, 2012

Stamp Simply CAS Christmas -treat bag

Hi everyone!  Welcome to another Stamp Simply CAS Christmas Wednesday!  Each Wednesday from now until Christmas, Sharon and/or some of her DT will show some quick and easy Christmas card designs.

Today I made a little treat bag!  I used a flat bottom glasine bag I bought at Michael's several years ago (from Martha Stewart), but you could modify this project to fit any little bag you have in your stash! 

Starting at the top, the paper is from My Mind's Eye Winter Wonderland 6x6 pad, which has a piece of Silver Mirror Cardstock die cut and glued to the bottom and a piece of velvet ribbon across the seam.  I then punched 2 holes through the bag top and threaded it with some 3/8" silver metallic ribbon and tied it into a bow.  The ornament stamp is from the JustRite stamp set, Noel Christmas Ornaments and I embossed it with silver EP, colored it with copic markers and added some rhinestones.  I attached it to the bow with some silver string.
It's impossible to take a decent picture of the silver mirror cardstock in a way that shows it as SILVER (it always reflects and looks gold), but trust me, IRL this is full of silvery goodness!
Now head on over to Sharon's blog and see what Christmas inspiration she has for you.  She didn't have a chance to make a card, but she DOES have some new amazing Christmas goodies in the store!

Thanks for stopping by and have a great day!  I'll leave you with a close up picture.
Card Deets:
Stamps - Noel Christmas Ornaments (JustRite Papercraft)
Paper - White and silver mirror cardstock; Winter Wonderland (MME)
Accessories - Spellbinders 2011 Heirloom Ornaments, Scalloped Rectangles; copic markers; silver embossing powder; silver/white metallic ribbon, 1/8" turquoise velvet, silver string, silver rhinestones
Photobucket

Monday, April 16, 2012

Altered wooden picture frame

Hi Everyone!   I have a quick post today sharing a Mixed Media project I made for one of my Spellbinders projects.  I can share today because it now appears in the Spellbinders Idea Gallery.  
I bought this circle wooden frame from Craft Warehouse on sale, it measures 6" across.  I started out by painting it cream, but it turns out I covered the entire frame with paper, so I really didn't need to do that.  This was pretty simple, I just covered the top portion with 1 pattern and the bottom with a coordinating one.  See how the the Want2Scrap circle Nestabling fits perfectly with the opening of the frame?  I LOVE it when that happens!!
I used the roses from the Bitty Blossoms set and the larger flower is the Spiral Blossom Three die template.  Happy sigh...  thanks for stopping by and have a great day!
I'll leave you with a close up picture.

Spellbinders Supplies:

Preferred Partner Products:

  • Want2Scrap, Say It With Bling Funky Swirls Black, Nestabling Heart Circles Black

Cross Promotional Partner Products:

  • My Mind's Eye, Life Stories Red Damask, Blue Damask, Tiny Red Flowers Patterned Paper
  • Echo Park Paper Co, Dots and Stripes Christmas Collection 6 x 6" Patterned Paper
  • Bazzill Basics Paper, Prismatics Classic Magenta Cardstock
  • Cosmic Shimmer, Twinkles Aqua
  • Creative Impressions, Organdy ⅛" Dark Green, Ric Rac Lime Green Ribbon
  • SCRAPBOOK ADHESIVES BY 3L, 3D Foam Squares

Photobucket

Tuesday, March 20, 2012

Magazine winners and a Spellbinders project

Hi everyone!  Random.org helped me pick 2 people winners for the Paper Creations Spring issue.  

Here are your random numbers:
3 10 
Timestamp: 2012-03-20 22:38:34 UTC
CLM-cindylu2u said...
Super cute card, would love to see how to make the flowers in the Paper Creations, thanks!!
Cindylu
Gregsgirl's crafty corner said...
your card is amazing, that's wonderful you have some designs published! Thank u for the chance to win
Congrats girls!!  Please email me with your address and I will get them in the mail when I return from Phoenix next week.  My contact info is on my sidebar.

I have a Spellbinders project to share before I go.  This project can be found in the Idea Gallery along with lots of other great projects!  This is a little gift box and matching mini card.  It is Christmas themed, but can easily be changed for any occasion.
 Here is a better view of the top.
 
Thanks for stopping by and have a great day.

Spellbinders Supplies:

Preferred Partner Products:

Cross Promotional Partner Products:

  • Echo Park Paper Co, Merry Christmas Holly Berry, Winter Wonderland Patterned Paper
  • Clearsnap, ColorBox Black Pigment Ink
  • Scor-Pal, ¼" Scor-Tape
  • SCRAPBOOK ADHESIVES BY 3L, 3D Foam Squares

Other Supplies:

Red Glitter Glue; Green Ribbon

Photobucket

Monday, October 31, 2011

Birthday Wishes box

Hi everyone!  I have a Spellbinders project to share with you today.  I was thrilled when Spellbinders released 4 box templates over the summer.  These boxes are quick and easy to make and you can decorate them for any occasion!  You can see all of them on the New Releases page on the website.

I made my box using the LF-012 Square Petal Top Box.  The box measures 2.75" wide and 1.5" tall.  I went pretty CAS with this one, using white cardstock for my box and a single piece of pattern paper for the side accents.  The flower at the top was made with S5-061 Daisy Flower Topper and I used 2 different colors to make it.  I just love the layers of this flower and the way you can curl up the borders on the petals, giving it a nice "fluffy" look!
 Here is what the die templates in the set look like:
See the 4 curved pieces at each end?  When folded, these end up being the top pieces and they tuck into each other and stay closed.  You can see that I used the negative diamond shaped pieces to accent the tag.  I just love using those little pieces instead of throwing them away.
 This picture shows how I added a strip of Scor-Pal 1/8" Scor-Tape around the top and bottom of each side and added glitter to them. 

You can see all the amazing projects from the Design Team on the Spellbinders website in the Idea Gallery!  The gallery has been updated and improved, sorted into the categories Cards, Scrapbook Pages and Mixed Media projects -be sure to check it out! 

That's all for today!  Thanks for stopping by and Happy Halloween everyone!

Spellbinders Supplies:


Preferred Partner Products:


Cross Promotional Partner Products:


  • Jillibean Soup, Watermelon Gazpacho Soup 6 x 6" Mini Pad Patterned Paper, Bean Stalks Blue Twine
  • Bazzill Basics Paper, Prismatics Skylar and Frosted Yellow Cardstock
  • Clearsnap, ColorBox Black Pigment Ink
  • Cosmic Shimmer, Cosmic Twinkles Aqua Glitter Glue
  • Scor-Pal, ⅛" Scor-Tape
  • SCRAPBOOK ADHESIVES BY 3L, 3D Foam Squares


Photobucket