Friday, October 3, 2025

Favorite craft room organization items -6 favs and 1 fail

Hi crafty friends! If you're like me you need crafty organization. Yep, we all do. I thought I would share a few items that I use and really enjoy.
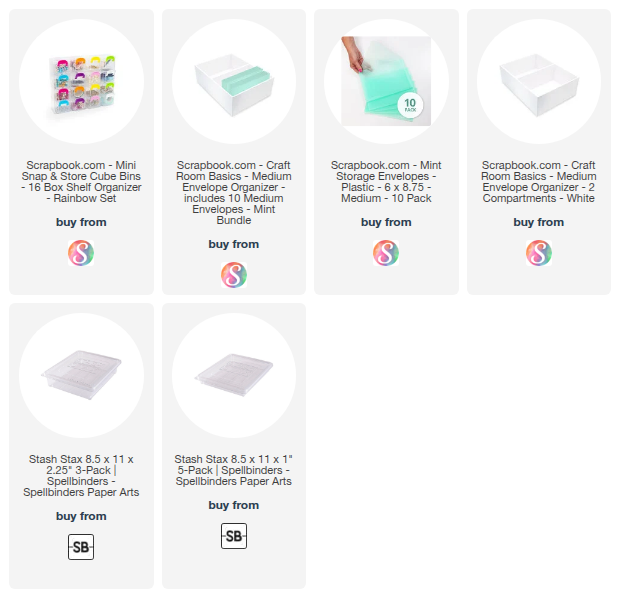
First up is probably most used and loved, is the Scrapbook.com Storage Envelopes size Medium. These are a sturdy thick plastic, measure 6x8.75" and are perfect to hold all kinds of things. I keep most in the coordinating storage box, but I have these all over my craft room and take them with me to keep crafty stuff organized when I travel.  
Here are pics showing how I storing my cover plates and release collections I work with. And I put the Spellbinders embossing folders in there to show they fit as well!!
 I work with a variety of collections from Spellbinders and I really try to keep them separated and contained. These are perfect for that! They come in Mint, Pink and Clear colors. The mint is perfect with my craft room colors.
 Next up is the new Scrapbook.com Mini Snap & Store Cube Bins. I currently store my favorite wax beads and stamps in these bins. There are 16 cube bins, each measuring 3.5x2.5x2" and are removable with a sturdy snap closure system. I like that I can pick the one cube to work with and bring it to my work area! Oh and the lids stay on cause I had 3 on my lap and they all fell and bounced off the floor and everything stayed closed!
 I use these pretty plastic flower palettes for my die cuts. I have 4 of these and always have a project started and sorted!! I got these from Amazon and they come in a 2 pack.
EDITED: these are sold out!!
How about a couple items from the Dollar Tree? We LOVE a good Dollar Tree find! Here is how I store my blending brushes. I have 8 of these. I store my blending brushes, watercolor and paint brushes, palette knives and other tools in them. These have 3 compartments and measure 4.5x2.25x3.25", each individual compartment is 1.5" wide. Look for these in the toiletries section, sometimes they hide in the closet organization section.
Another favorite thing from the Dollar Tree is this scraper. It's not organization, but I use it all the time to scrape little die cuts that gets stuck on the cutting plate! You can find this in the craft section near all the vinyl cutting accessories.
And finally, I am really loving the Spellbinders Stash Stax boxes! They come in 8.5x11 and 12x12 sizes, here is a pic of mine filled with Altenew goodies. This is the 8.5x11", 2.25" tall. These are VERY sturdy, fit LOTS of stuff and have a really secure closure. I took these to Seattle when I stayed at a hotel for a week. They were amazing and fit in my travel suitcase nicely.
Now for the FAIL. This fail is from Dollar Tree and it's not organization, but since I mentioned the scraper I wanted to let you know about this. They sell adhesive remover erasers and they don't work AT ALL. They are super hard and don't remove a thing except for your patience. Stick to the OG Adhesive eraser by Therm O Web and save your $1.25!! 
I hope you found this helpful and I'm curious to hear if you have any favorites!!
 
There are affiliate links in this post. This means if you shop with these, I will receive a small commission at no cost to you. If I've inspired you in some way I appreciate your support. 
Thanks for stopping by and have a great day!
 

Wednesday, May 1, 2013

Some reorganizing and a spring cleaning giveaway

Hi everyone!  So last Friday, I made an impromptu trip to IKEA and ended up buying stuff to reorganize a portion of my craft area.  If you're like me, it's fun to get some new  organization stuff every once in a while.  Here are a couple pictures of what I did.
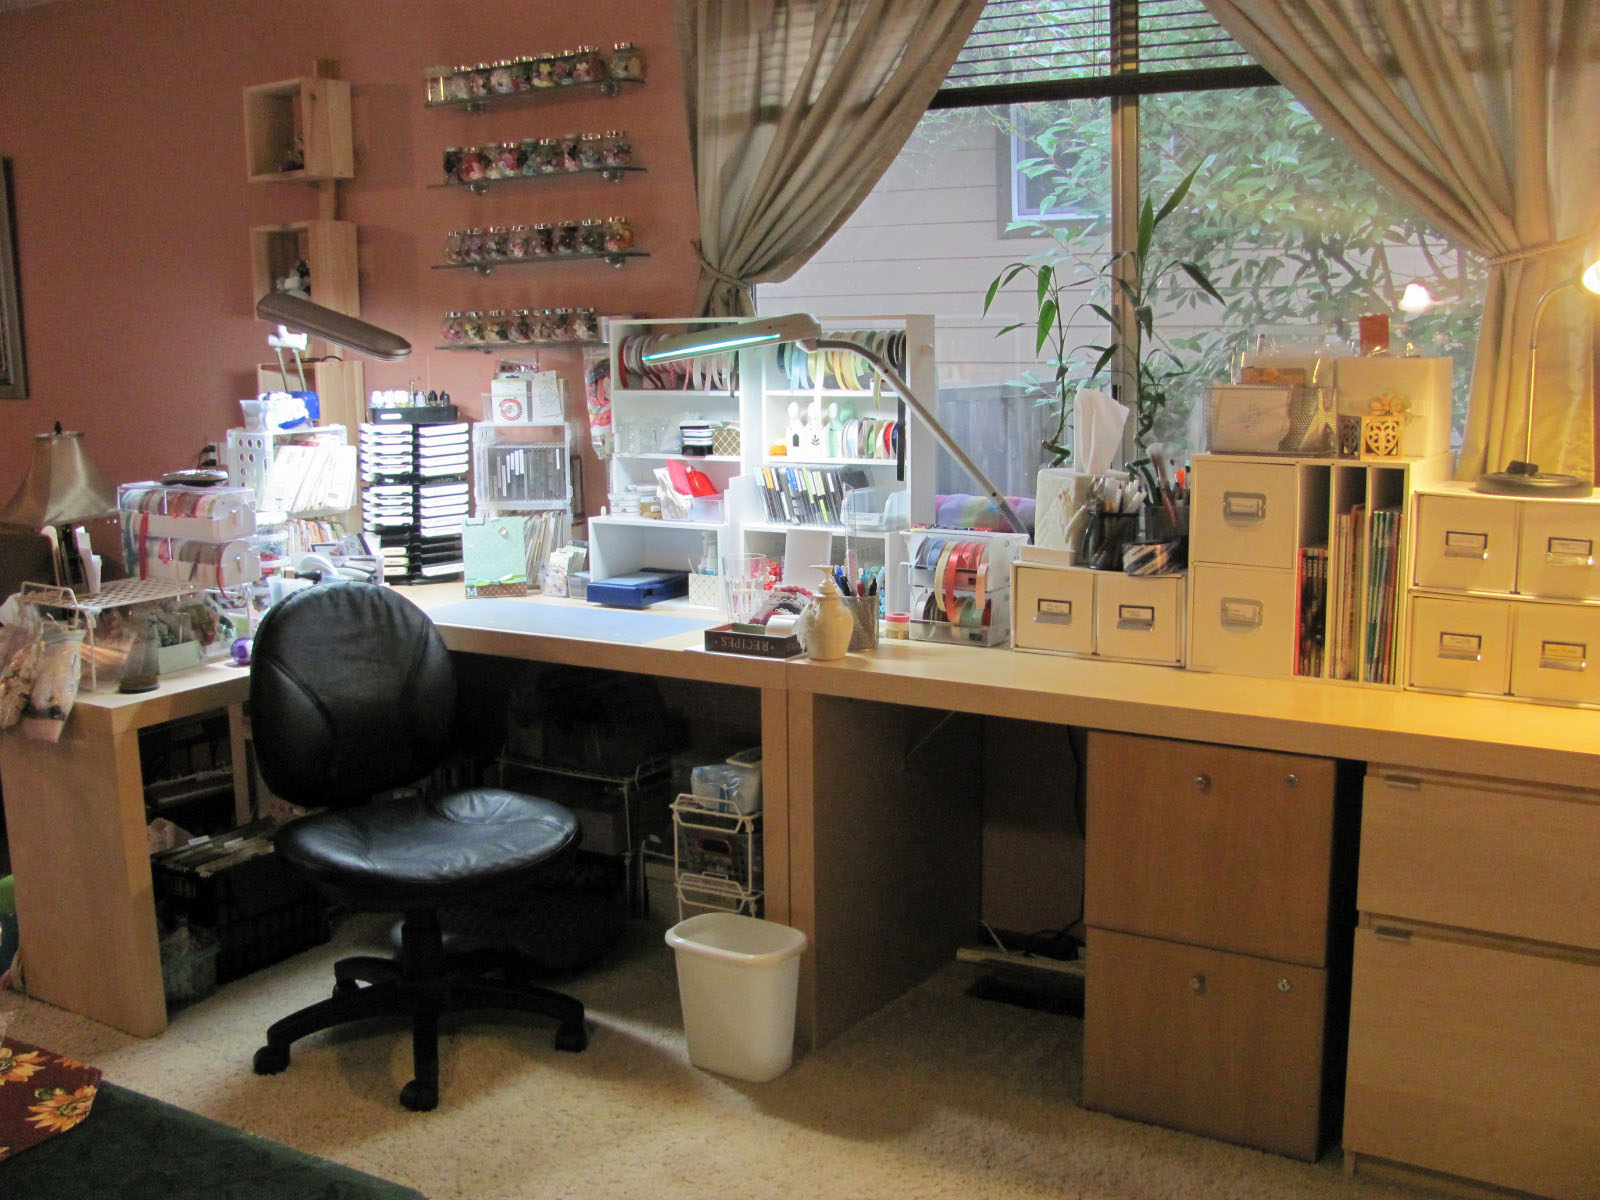
 Here is my main area, which is off the family room (on the left).  Yeah, I admit it, I have organized clutter everywhere.  Every surface of my craft area has a box/container of some sort with my stuff in it.  But, hey, I like things out where I can see them!
This is under my desk.  Because my desk faces a window, don't have a lot of wall space for shelves and such, so I utilize EVERY INCH of floor space I have.  I bought a couple Billy height extension unit pieces (both the 20" and the 32" sizes).  Technically, they are supposed to go on the top of the bookcases, but I used them on the floor to give me a sturdy way to have extra shelf space. I installed under mounted lighting (also from IKEA) to help me see where things are when I craft at night.
The white boxes are Kassett boxes, they are a stiff cardboard material and work perfectly for stamps, ribbons, buttons etc.  I keep my Gina K stamps in A5 clear 3 ring binders which I buy online at Univenture.  The middle shelf on the left are all my AMuse stamps and those colorful plastic organizers (between my Gina K stamp binders) are from Joanns (Jewelry section) and I keep all my buttons in them sorted by color.

Here is under the left side piece of the desk where I keep all my cardstock (Gina K, Amuse and Bazzill Card Shoppe) and my May Arts ribbon.
Here is a close up of how I store some of the ribbons from The Stamp Simply Ribbon store.  I use the clear plastic boxes and sort the ribbons by category (silk, stripes, ric-rac, etc).  They help me keep my ribbons neat and organized.  You can see them behind my cardstock in CD boxes I bought at Target.
 Here is the top of my work space.  I have a slight addiction to inks and am constantly struggling how to store them.  On the left I have my AMuse and SU inks in the SU ink holder with extension (I have so outgrown this).  On the right I have my extra inks and all my Gina K inks.  The top of the 4 tiered unit is supposed to be for ribbon, I removed the ribbon rod and I now use it to hold embellishments and more inks.
 
 Here is how I store my newly purchased sequins (love these)!  I had these little plastic containers from my friend Heidi who used to have an online store.  They held Dew Drops remember those from years ago?
 While I was doing the reorganizing/ spring cleaning, I found some extra goodies that could use a new home.  So I have a giveaway!
Here is what I have to pass on:
Paper Creations, Spring issue
Brand new GCD and Pink Paislee Christmas (used 3 sheets) paper packs 
 and
Corduroy brads, wooden buttons, wood veneer shapes, ribbon, flowers, buttons and bling!
To be entered, just leave me a comment here on this post and I will pick a winner on Sunday, May 5th.
Thanks for stopping by and have a great day!!

Photobucket

Sunday, January 20, 2013

Spellbinders die organization

Hi everyone!  I spent the greater part of yesterday cleaning out and organizing my craft area.  Whew, it was quite a job.  Since I often get asked how I store my Spellbinder dies and my craft area was relatively clean, I thought today would be a good day to do this post.
Being on the Spellbinders team for 2 years (and having a slight addiction before hand) I have a crazy amount of dies and have to be creative on how I store them.  I have many systems as I have too many dies for any one way to store them.  

First, I keep my basic "go-to" shapes and favorite "labels" shapes in CD cases in my stamp area at my fingertips.  Because I use these the most, I give them prime real estate.  I used my new Brother P-Touch label maker to do the labels for my CDs (now they are all nice and pretty).  I keep the CDs with my copic markers and overflow ink pads.
The majority of my dies are kept in 11x6" baskets I got at the Dollar Tree.  These are to my immediate left and I keep the dies organized by category.  Basic Shapes are the sets that coordinate with squares, circles, etc like Splendid Circles.  I also separate out my Flower and Butterfly sets, Banner and Tags, Accent and Motifs, Multiple Image sets (these would be sets like French Frills and Home Sweet Home), A2 sets and Favorites which would be Bitty Blossoms, Rose Creations, Lacey Pennants and others.  These baskets are kind of a hodge podge of stuff and things are rotating in and out all the time, so they are not pretty!
If I have the original packing, I try to keep my dies with it.  Here I have added adhesive backed magnet business cards right over the sticky tape the dies came on.  I fold over the cover and adhere it closed to make it nice and sturdy.
 I don't always have the packaging with my sets, so I came up with this system.  I take cardboard, trim it to the size of the Spellbinders packaging.  I glue white cardstock over one side and add the business card magnets across it.  Most of the time I can fit 2 die sets on it. 
Tip: stick the die to the magnet with a small piece hanging over, that way it's easy to lift off.
On the back I keep a little baggie with the shapes cut out.  I like this because it's helpful to take the shapes and play around with them on your project.
Here is a birds eye view of the baskets (yes, that's washi tape spools on the left)
 Here is how I store my Edgeabilities dies.  You can get these basic trays 9.5 x 3" in any office supplies store.  I keep the dies with the coordinating Want2Scrap Say it with Bling rhinestone borders.
Storing the Grand Nestabilities was a challenge at first, but I saw someone post using the big 10 1/2 x 11 1/2 binders (I buy mine and the plastic inserts from Univenture).  I like these binders because they close completely and things won't fall out.  I also use the same binders in the 8.5 x 5 size to store my Gina K and JustRite stamps.
At first I was using a full 5x8 adhesive backed magnet sheet per set and adhered the packaging to the back of the previous page so everything would be complete.  But I quickly ran low on magnet sheets...
 ...so I took to cutting them in smaller pieces and using them this way.  This also worked better for sets with multiple images...
...then I ran out of those and found some adhesive backed magnet strips at Office Depot and did this.  Then I ran out of the hard plastic inserts, so I started putting the sets into plastic sheets and using a glue dot at the top (shown on the left).  I have to say these binders sure hold a lot of die sets!
So there you have it.  It's not always pretty, but it does the job and keeps me organized.  Thanks for stopping by and have a great day!

Photobucket

Monday, December 20, 2010

Clean stamping area, the WINNERS, and a Christmas card

Hi everyone!  Thank you to everyone who commented on my giveaway.  What amazing readers you all are!!  I am glad to know that I am NOT the only one with a crazy messy stamping area.

Well, crazy messy NO MORE!!!

After 3 days of cleaning out, including a marathon 6 hours with my sister's help Saturday night (yeah, I have no life), I am happy to announce that my stamping area is CLEAN and ORGANIZED again!  Yep, let's just say someone who shops at my local Salvation Army will find lots of stamping and craft items.  And, there may be a few more items tucked away with the envelopes of stamping goodies I am sending away.

Speaking of which, here are the winners from my giveaway!

The two winners of the MME Breaking Free kit and a Verve stamp set are:
1.  Lisa said...
Thanks so much for the chance!!! I love your blog and try to visit once a day cause your inspiration is limitless!!!!

2.  Tanya said...
EEEKKK! thank you so much for the fabulous chance! Have a great weekend! :)

The FOUR winners of 2 Verve stamp sets (and maybe a couple more goodies) are:
1. Tami said...
how fun! Cleaning is always a good thing :) Thanks for the chance! miss chatting with you!
and
2. Terri Milstead said...
Thanks for a chance to win some goodies. I want to say thanks also for sharing all of your beautiful cards all year. I truly enjoy stopping by and looking at your creations. Have a wonderful holiday!
3. Anonymous said...
Thank you for this wonderful opportunity on this great giveaway. Couldn't help but give alittle smile when seeing the string on back of your chair. May you all have a Very Merry Christmas and Happy and Blessed New Years. ColleenB.
4.  JJH said...
Hi Michelle - It is interesting that your craft area mimics mine: lots of stuff and a little area to work in. Happy cleaning. I will do it too. Thanks for all your inspirations! Roses are my favorite flower which is why I starated reading your blog!

Congrats to everyone!  Please email me at cardsbymichelle@hotmail.com with your address.  Regarding the Verve sets, I will allow the first to email me to get first pick from the list and so on. 

Here are the "after" pictures of my stamping area.  Scroll down to my previous post if you missed the "before" pics.
Here is the wide shot of my main wall, which is 2 IKEA desks side by side.  The desk on the left has a "L" pull out piece, the one on the right has a drawer/door combo.
Here is a closeup of underneath my main desk.  That light mounted underneath on the right makes all the difference and was less than $10 at IKEA.  It turns the underneath into a fully functioning area.  I keep all my buttons, clear stamps, Gina K stamps, flat punches, ribbons and extra cardstock there.
Here is my cutting/embossing area.  I keep my new Grand Calibur, Score-Pal, Tonic cutter and 12x12 paper on top and my Cuttlebug and JustRite stamps are on the rolling cart underneath along with my sewing machine.
Here is a pic of the "ribbon" corner.  The storage boxes hold extra bling, adhesive, chipboard and glitters.
And I will leave you all with a Christmas card.  This one uses Gina K's Light of the Season and Mugs and Kisses (for the sentiment) sets and Mistletoe PP from Memory Box.  I just loves me the circle cards!

Thanks for stopping by and have a MERRY CHRISTMAS everyone!!

Tuesday, December 29, 2009

Stef makes me smile and copic storage

Hi everyone! A quick post today. I had time last night to play along with this week's Featured Stamper, SmilynStef! She is such a fun person who is very talented AND very generous with her comments around the galleries and blogs.
I chose a tree to case. I changed the paper and the image, but really kept with the feel of the card. I used Cosmo Cricket, Earth Love. The image is from Miss Anya Dressy from The Greeting Farm and the sentiment is Verve's Thankful Hearts. I colored her with my copics and decorated the card with some accent pearls and buttons! I even did some stitching. To get her to "sit" on the bottom piece of cardstock, I cut her legs out but kept the sides in tact. Then I slid her legs over and popped out the upper part of the panel. Looks kinda cool. Here is a detail pic of the buttons.
 
I received several emails and questions about the Copic Marker storage I showed yesterday, so I also wanted to give you all some more details. The white organizer pieces are from JetMax, their white storage cube system.
I got all mine at Craft Warehouse on sale for $20 a cube. The one I use for my Copics is called the Embellishment Center. Here is my entire piece. I have 2 side by side. Most of my PTI ribbon are on the top bar, the next shelf holds my Martha Stewart ribbon and Oregon Raindrops, next one has my Nestabilities in CD cases, pencil/pen/file/stuff holder and my stickles and shimmerz, with the bottom holding my Copics.
I use clear bookends that I found at IKEA for dividers within the white cube bottom. Then, to further separate the markers, I slid in some Cuttlebug embossing folders that I rarely use. Not the prettiest, but it works! Here is a close up pic and one of the bookends. Well, thanks for stopping by and have a great evening!!

Tuesday, March 10, 2009

MY REMODELED STAMPING AREA!

Woohoo! My dream stamping space is finally finished! Deep breath! A big thank you to Heidi (Pinkhedgehog) and IKEA -I couldn't have done it without you!! LOL! Warning, this is a long post! You can click on each picture for a closer look. At the very bottom, I will list the names and prices of the items I bought. Which I found extremely helpful for me when I was scouring SCS for ideas! Also, I apologize in advance for the spacing around my pictures.

Edited to add: My stamping area is not in a room by itself with a door. It is at one end of the dining/family great room. When I swing to the side, I face the boys play area and the TV. I can stamp and keep an eye on the boys in the day and stamp and watch Lost at night!!

Well, here is what I started with. My old stamping space was a corner of the dining/family room. I had an L shape space with about 6' on each wall. It was crowded but efficient. I literally sat and stamped surrounded by stuff. I plain and simply OUT GREW IT! See the corner of the buffet on the bottom left corner? That is the piece of furnitue that my mom took... it freed up the entire wall for me!


Here is the wall blank. Notice the BIG 6' long window (covered up by a curtain)? That really limited what I could do as far as height, shelving, etc. But, hey I'll take it!!


Drum roll please... here is the new space! Oh, heaven! I went with 2 IKEA desks side by side. Sturdy, inexpensive and efficient.


I'll start with the far left of my area and go clockwise. Here is my glass shelving for my primas. I got the matching glass jars at IKEA (packs of 4). The glass shelves are 4" deep and 3' long. Notice I am ALL out of space already? I asked Bill what was I gonna do when I bought my next jar of primas and he looked at me like, "WHY would you need any MORE?" LOL!


So I bought the wooden box shelves to the right from IKEA, these hold some Capodimonte pieces right now, but they are "earmarked" for more primas! They are shown in the top picture. Here is a close up of the shelves. Aren't they purty?


Next we have a pic of the left desk. These are from the Jonas collection. I needed something that didn't have lots of computer type stuff built in since I was primarily using it for table space.

This desk has a pull out arm, giving me an extra several feet of space when I need it. And I can slide it in when I don't! Man IKEA does it right when it comes to space efficiency!


Here is a picture of under the desk. Since I couldn't go up, I needed to use EVERY inch of under the window. I still have an undermount light to install. But, you can see that I have my 12x12 and 8 1/2x11 paper storage, all my clear stamps, loose stamps, all my brads, buttons and pretties. Everything fits nicely and still room for my feet!


Here is the right desk. This one came with a cabinet attachment. The top is a drawer and the bottom is a door. Lots of stuff fits in there! See those white box/drawer things? They are cardboard type self assemble and on sale at IKEA for $3 each! Can't beat that!


Also under the desk is my filing cabinet that stores all my cardstock. I sort it by color family and alpha within each. I got the fancy labels from EBay for a few bucks. I love it, cause I can see the color and the name. I keep my scraps behind the full sheets in manilla folders.


Here is my pegboard system! I got the idea for the entire system from Heidi! The ribbons are stored in vinyl gutters from Lowes (not sold at Home Depot). You drill some holes in them and hang them on the pegboard! Isn't it purty? I have them cut the biggest I could which is 39" across. I have 4 now, but plenty left over, so if I need to expand, I can. See the cards at the top? Now I have room for my RAKs!! I hung a dowel and put the cards over it. I intend to get another piece cut larger later, but for now I fit 7 cards on this side.


What I LOVE about pegboard, is if you need to move something you can. Just pop off the pegs and move it! Here is a close up of my ribbon rings and the gutter. I painted the pegboard to match my wall (even the screws), so it blends in a bit.


Here is the other wall. I already had this piece of countertop installed on the wall and kept it. I removed the old shelving on the left and replaced it with more pegboard. I kept the shelving on the right and added an undermount light so I can see what I am cutting when I stamp at night. The light is from IKEA called RANTA. Underneath the countertop is perfect for storage for those "leftover" things.

On this side of pegboard, I have all my punches and more RAKs! Again, I painted it to match the wall. Below it I have my 12x12 DP storage, my cuttlebug and accessories.

So that's it! Whew! I told you it was a long post. Here are some details of the items:
Jonas desks, IKEA -$140 ea
Glass shelves, Lowes - $15 ea
Glass jars, IKEA - $3 for 4 pack
Pegboard -$17
Pegboard misc assortment of accessories -$2.50
Gutters, Lowes - $7 for 10ft
Gutter end caps, Lowes - around $2 ea
Cafe curtain rods, Bed Bath & Beyond -$7 ea
Thanks for stopping by! Coming up tomorrow a post with all my Verve release cards made thus far! Julee outdid herself with this release with 8 sets and 5 Plain Janes!


Photobucket