Friday, June 23, 2023

For You 2 color wax seal floral card

 Hi everyone! I'm back today with another wax seal card using some new goodies from the Spellbinders Sealed for Summer collection. I attempted the 2 color wax technique and after a few attempts, I got a usable result. LOL! Kidding aside, this technique will take time to master.

How I did it:
1. I poured the first color (pastel lilac) directly on to the wax seal stamp and made sure to pour enough wax to fill all the design grooves
2. Then, while it is still hot I quickly scraped off the excess wax
3. When it completely cooled, I cleaned off the stamp making sure any excess wax pieces were removed, leaving only a clean design
4. Then I poured the second color (enchanted) on to my glass surface and placed the wax seal stamp into the second color.
I love the results of this technique! I got a few air bubbles and will have to work on it some more.
 

The For You wax seal stamp is part of the 3 pack of stamps and it is GORGEOUS. The grooves are deep enough that they really stand out in the wax and make the perfect template for the 2 color wax technique. All the beautiful flowers are from new Sealed Blooming Stems die set and I used the large bloom from the Be Bold Blooms die set. And what do you know - they are the same shape and nest perfectly!! LOVE!
 
Supplies used on this card:
 Wax Beads in Pastel Lilac and Enchanted
Spellbinders cardstock in White, Fern, Lilac Blossom and Purple Mist; Concord & 9th Parsley

Thanks for stopping by and have a great day.

Thursday, July 12, 2018

Color burst pencil combos to match new FSJ colors

Hi everyone! I mentioned yesterday that I was working on pencil color combinations for our 6 new colors. Well, I figured them out and think they are a pretty close match. These color combos are for the Color Burst Pencils. I imagine they would be similar with the Color Splash pencils, but I have not tested those.  Before I get to the colors, I want to share a few tips I came up with while I was tinkering around.

Tips for blending multiple colors: 
1. When you lay down the color, try to lay it evenly without sharp lines. Sharp lines can be hard to blend. Try "dulling" the tip of the pencil on a scratch paper to minimize sharp lines.

2. If you DO end up with some thick or sharper lines, take a white eraser to them to lighten them up and start again. Try to get the color even before you add your next color.

3. If you like to blend your pencil colors using stumps with baby oil or Gamsol, keep in mind the last color laid down will be the first to come up with blending. After you blend, go ahead and add another layer of whatever color you added last.

4. The order of the pencil colors do matter. But for fun try switching them up, you will get different hues and be used when making shadowing/shading your images.

Disclaimer: I am not a professional colorer (is there such a thing? lol). I know many of my readers are way more experienced in coloring, so I would love it if you have additional tips to share! Leave me a comment below for all to see.

--Chambray Shirt--
--Rustic Rose--
--Haystack--
--Fresh Sage--
--Tin Pail--
--Peaches and Cream--
Thanks for stopping by! I hope this was helpful.

Thursday, May 21, 2015

Contemporary dogwood flower card

Hi everyone!  I have another fun flower card to share.  I've been into purple lately, so when designing this I reached for the fabulous Deep Lilac cardstock to pair with the awesome Contemporary Circles die set!
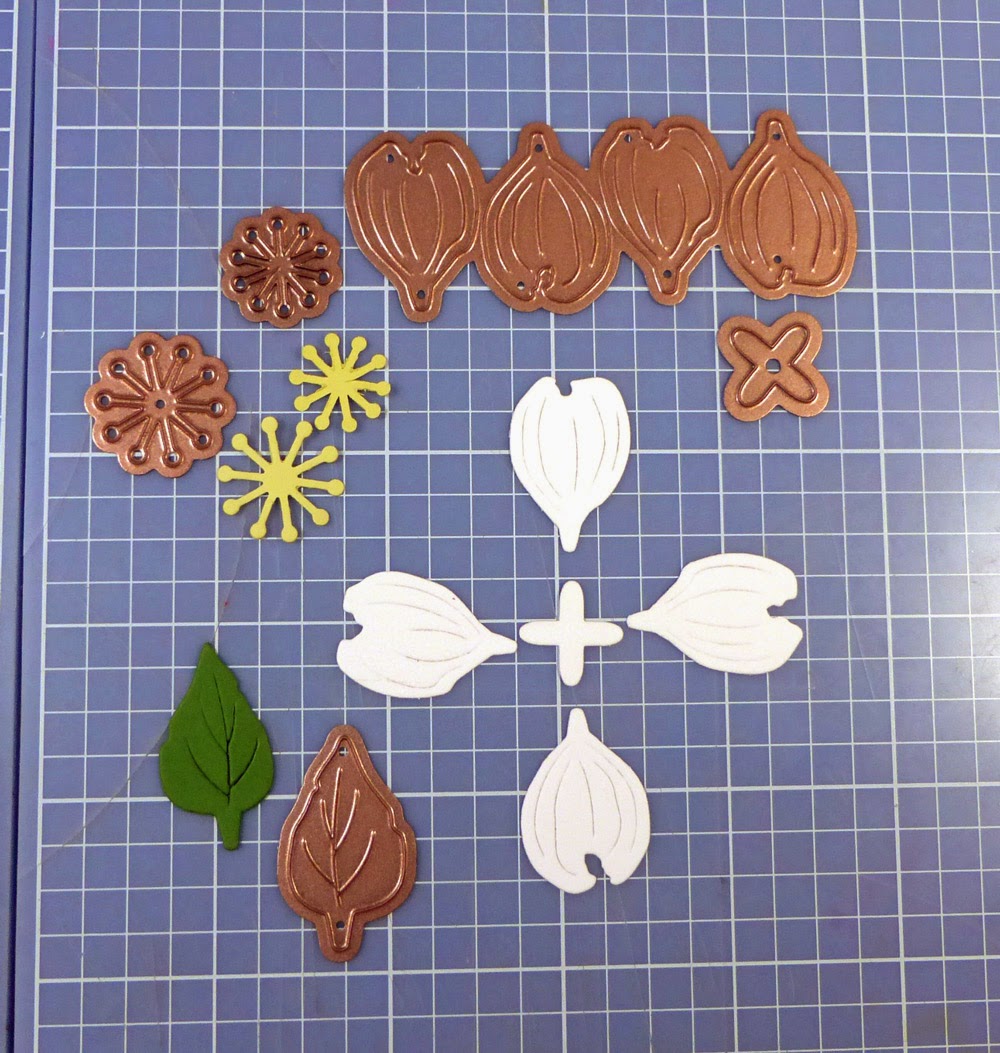
The flower on this card is from the Create-a-Flower series of dies (which has 24 flowers in it now!) and is the Dogwood.  I love it and it is super easy to make.  You only have to die cut the pieces once (other flowers require multiple pieces).  Here is a picture.
I lightly sponged some Bubblegum Pink ink onto each petal and bent them slightly over my thumb.  I then glued the petals to the petal base.  I overlapped them at the center to get my petals close enough to touch at the sides.  The stamens are also super easy, just a tiny curve with my embossing tool and done. 
Here is the Contemporary Circles, isn't it the coolest?  It also comes in a Square and Diamonds!!
 Thanks for stopping by and have a great day!  Here is a close up picture.  You can see I added a sequin and pearl to the center.
Card Deets:  
Spellbinders Supplies:  
Dies: Dogwood (S2-125), Contemporary Circles (S4-498), Celebration (IN-012)
Other Supplies: 
Fun Stampers Journey cardstock in Black Licorice, Sweet Pear, Deep Lilac, and Kiwi Kiss and Journey Sequins in Bloom Time; Blush pearls in 2 and 3mm
Adhesive: Tombow USA Mono Multi liquid glue; Scrapbook Adhesives by 3L Foam Squares
Photobucket

Tuesday, May 19, 2015

Crafty flower birthday card and another winner

Hi everyone!!  I have a fun card to share that uses one of the new flower die series from Spellbinders called Crafty Flowers.  There are 6 sets in this series and my card uses Crafty Flowers 3.
I also used the Fancy Lattice die if a fun way.  First I cut out a rectangle from my card front using my paper trimmer.  Below I show after my first 2 cuts.
Next I die cut some white cardstock using my Fancy Lattice die.  I adhered it to the back of the opening using white liner tape.  Then I adhered a piece of purple ombre patterned paper behind the opening.  Fun huh?!?
Next I die cut the pieces for my flower.  I ended up using 5 of the medium sized petal and 10 of the small petal.  These flowers are pretty easy to assemble.  There is a split in the bottom of the petal and you separate it and adhere it to the petal base, shown below.
______________________________________________
Before I go, I never heard back from my Fun Stamper's Journey prize package winner I announced last week.  So that means I get to pick another winner!!  Random.org helped me chose:
 #31
Babbi Rissling May 5, 2015 at 9:38 PM
Perfection! Cheerful on so many levels. Love it!

Congrats Babbi!  Send me an email (info on my right side bar) and I will forward your address to FSJ right away!  You have until Thursday to get back to me.
___________________________________________________________
Thanks for stopping by and have a great day!  Here's a close up picture.

Card Deets:  
Spellbinders Supplies:  
Dies: Fancy Lattice (S5-152), Crafty Flower 3 (S2-170), Springs (S2-048); Sentiments One (S2-082) (ES-009)
Other Supplies: 
Fun Stampers Journey cardstock in Black Licorice, Banana Cream, Pretty Amethyst, Lavender Fusion and Lemon Grass and white liner tape; My Mind's Eye "Sherbert" 6x6 pad; purple rhinestones
Adhesive: Tombow USA Mono Multi liquid glue; Scrapbook Adhesives by 3L Foam Squares

Sunday, February 8, 2015

Gerber daisy hello card

Hi everyone! I have a fun card to share today using one of the older shapes, the Curved Rectangles and one of the Create-a-Flower dies, the Gerber Daisy.  
With this flower, there are 3 sizes of the petals: large, medium and small.
To make each layer you will need 8 petals.
I wanted my flower more full, so I cut each size two times.  You can see the cuts below.  One good thing about the petal die is there are 2 of each petal size on it, so you will need to run it through 4 times, make sense?
Next you tuck the point of each label into the slot of the "layer forming disc" and then glue it down.
I added some stickles to some of the petals and sentiment and added some chino colored pearls as accents.  I embossed the flower panel with the Graduated Dots folder (I used side A).  This is a cool Grand sized folder, you will notice the dots get smaller in size as you go down.  The reverse side is also cool, check it out.
Thanks for stopping by and have a great day!  Here's a close up picture.
Card Deets:   
Spellbinders Dies:
IN-037 Celebration Two, S2-066 Create-a-Gerber Daisy Shapeabilities®; S5-006 Curved Rectangles Nestabilities®; EG-001 Graduated Dots M-bossabilities folder
Other Supplies: White and kraft cardstock; ; Kaisercraft, hot pink rhinestones
Adhesive: Tombow USA Mono Multi liquid glue; Scrapbook Adhesives by 3L Foam Squares  
 

NOTE: You can also find Spellbinders dies at the The Stamp Simply Ribbon Store.
Photobucket

Friday, August 22, 2014

Sunflower congratulations

Hi everyone!  Today's card uses the Create-a-Sunflower die set.  I haven't had a chance to use this set and with fall around the corner (gasp!), I wanted to try it out.  I also used the Majestic Circles set.  Spellbinders has many many beautiful decorative die sets that coordinate with the basic shapes of circles, squares, rectangles and ovals -I just have to remember to use them more often!
It was actually pretty easy to make.  Here is a picture of the die cuts needed for the flower.
You will need to cut:
10 flower petals of each size (since the petals are on 1 die, you need to run it through 10 times)
4 petal bases (adhere the petals to each of the 10 "pointy" parts)
1 flower center
amount of leaves is optional

Thanks for stopping by and have a great day!  Here's a close up of the flower details.
Card Deets:  
Spellbinder dies: S2-061 Create-a-Sunflower Shapeabilities®, S4-420 Majestic Circles and S4-114 Standard Circles LG Nestabilities® 

Stamps: JustRite Stampers, Large Elegant Sentiments
Paper: White, daffodil, chocolate and green cardstock; My Mind's Eye, In Bloom 6x6 paper pad
Embellishments - Stamp Simply Ribbon Store: Prima flowers Audrey in Turquoise Teal, My Mind's Eye Enamel dots; Wink of Stella glitter brush in clear

Adhesive - Tombow USA Mono Multi liquid glue; Scrapbook Adhesives by 3L foam squares
NOTE: You can also find Spellbinders Die Templates at the The Stamp Simply Ribbon Store. 


Photobucket

Saturday, June 21, 2014

Create-a-Flower: Gerber Daisy tutorial

Hi everyone!  I have a fun summer Thank You card to share today.  Most of you are familiar with the new series of dies from Spellbinders called Create-a-Flower which make amazing realistic flowers!!  They are also in the Die D-Lite category, so they have a lower price.  Win-win!  You can see the Create a Rose flower I made on this post.  My card today uses the lovely Gerber Daisy.  And I have to say, this is a pretty easy flower to assemble. The accent flowers are made from my oldie but goodie die set, Bitty Blossoms.
Here are some step out photos showing how I made the flower.
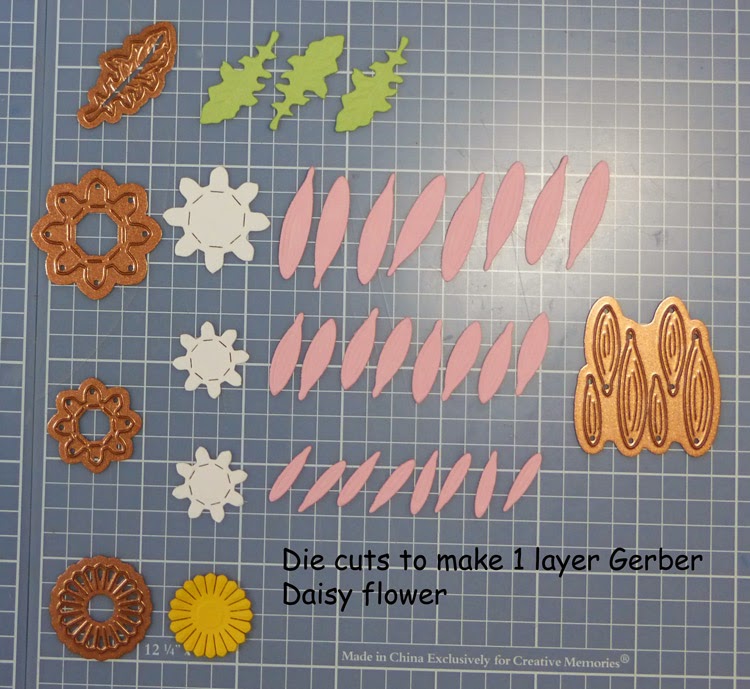
This picture shows cuts for a 1 layer flower.  Note: After seeing it assembled, I wanted the flower a bit fuller, so I made 2 of each petal size.  Essentially made all these cuts again.
 To assemble the petal layers, just poke the petal end into the pre-cut slit on the base.  To secure my petals, I added a dot of glue to each.
 Here is what it looks like from the underneath side.
 Here you can see how each petal layer looks assembled, the top two are already doubled up.  The lower ones are what they look like as a single layer.
Thanks for stopping by and have a great day!  Here's a close up picture of the flower details, you can see I added some stickles to some of the petals.
Card Deets: 
Spellbinder dies: S3-206 Create A Gerber Daisy and S5-086 Bitty Blossoms Shapeabilities®, S4-310 Labels Eighteen Nestabilities®, EG-002 Dainty Dots M-bossibilities Folder
Stamps: Fun Stampers Journey, Greet and Shout stamp set 
Paper: Bazzill Paper Basics, Marshmallow, Cotton Candy, Lollipop, Marshmallow Chick, Sour Grape and Easter Grass Card Shoppe cardstock; 
Ink: Tsukineko, Versafine Onyx Black
Embellishments - Stamp Simply Ribbon Store: Kaisercraft yellow rhinestones and Pink/white baker's twine; Sentiment label is sticker from Little Bee
Adhesive - Tombow USA Mono Multi liquid glue; Scrapbook Adhesives by 3L Foam Squares 
NOTE: You can also find Spellbinders Die Templates at the The Stamp Simply Ribbon Store. 

Saturday, May 10, 2014

Vellum leaves

Hi everyone!  My son's baseball game was cancelled for rain, so I had a chance to make a fun card die cutting vellum.  First, using the Labels Eighteen and and nesting Oval dies, I made a frame that I placed slightly off center.
I love this technique because by layering your dies, you can make custom frames using any pattern papers or cardstock you have on hand.  In this case, I used some pattern paper scraps I had laying around.
For the vellum branch, I die cut vellum using the branch die from the Sprigs set.  Before I took the vellum out of the die, I stenciled in the leaves with some Versamark ink.  Then I carefully removed it, sprinkled it with some white embossing powder and viola!  A cool side effect is when you heat emboss vellum it gives it a slight curling, so the leaves are slightly raised and curled!  I adhered them down using a glue dot which I hid behind the white embossed parts of the leaves.
Thanks for stopping by and have a great weekend!  Here is a close up picture of the embossed detail.
Card Deets: 
Spellbinder dies: S4-430 Sprigs Shapeabilities®, S4-310 Labels Eighteen, S4-110 Classic Ovals LG and S4-112 Classic Ovals SM Nestabilities®
 
Paper: Bazzill Paper Basics, Marshmallow Card Shoppe cardstock; Vellum cardstock; American Crafts, Dear Lizzy 6x6 pattern paper
NOTE: You can also find Spellbinders Die Templates and vellum cardstock at the The Stamp Simply Ribbon Store.

Photobucket

Saturday, April 26, 2014

Birthday Create-a-Rose card

Hi everyone!  Have you all had a chance to check out Spellbinders' new line of dies called the Create-a-Flower?  They make really cool realistic looking flowers!  I've used the Create-a-Rose on my card and I took a couple photos along the way to help demonstrate how to make the flowers.
Here is what the die set looks like:
What's cool about these dies is that the 2 leaves and 4 petals are each on 1 die together, so this decreases the amount of times you run them through your machine.
Here are all my die cuts laid out.
My large rose used 6 of the largest petals
5 of the second largest petals
5 of the second smallest petals
4 of the smallest petals (3 curled, 1 not)
 I made my roses with both pattern paper and cardstock to give them a whimsical feel.
There are many ways to form petals.  I went with quick and easy and gently curved the petal tops backwards over a small paint brush, then cupped the petal bottoms upwards.  This allows the petals to curve up with the ends back.  Put your glue at the back of the little petal stem.
Begin by gluing 6 large petals around the base and building up from there with each size.   Lastly I curled my smallest petals inward and glued them to the center, adding a glitter dot to the center.

You may have noticed the glittery lattice piece?  I die cut white cardstock with the Fancy Lattice expandables die, then ran it through my Xyron machine and sprinkled the glitter on it.  With the Xyron, you get complete coverage for your glitter.  I used a Quickie Glue Pen to adhere it to my card.
 Thanks for stopping by and have a great day!  Here's a close up picture of the roses and lattice detail.
Card Deets: 
Spellbinder dies: S2-067 Create-a-Rose and S5-152 Fancy Lattice Shapeabilities®
Stamps - JustRite Papercrafts, Large Elegant Sentiments; 
Paper: Bazzill Paper Basics, Marshmallow, Spearmint Stick, Robin's Egg and Sugar Wafer Card Shoppe cardstock;  My Mind's Eye Follow Your Heart "Record It" 6x6 pad;
Embellishments - Stamp Simply Ribbon Store: May Arts, Burlap String, Ultrafine Crystal Glitter; SEI, Silver glitter dots
Adhesive - Tombow USA Mono Multi liquid glue; Scrapbook Adhesives by 3L Foam Squares; Xyron 9" creative station

Wednesday, January 8, 2014

Belly Band gift set tutorial

Hi everyone!  Welcome to Day 4 of the Spellbinders Paper Arts Diamond Anniversary Sneak Peek and Giveaway.  I am excited to show you one of the new die templates being released at the
Winter 2014 Craft and Hobby Association trade show! 
The die set I'm working with today is the S5-212 Belly Band One!

Supply List for Gift Card ensemble:
 S5-212Belly Band One
 S5-185 2013 Snowflake Pendant

Tutorial how I made the belly bands for the bottle and gift card holder:
1.  Trim cardstock to 8 1/2" x 2 1/2"
2.  Tape die down with the bottom line of the die parallel to the bottom edge.  For this layer, I used Belly Band Die #2 (with #1 being the smallest).
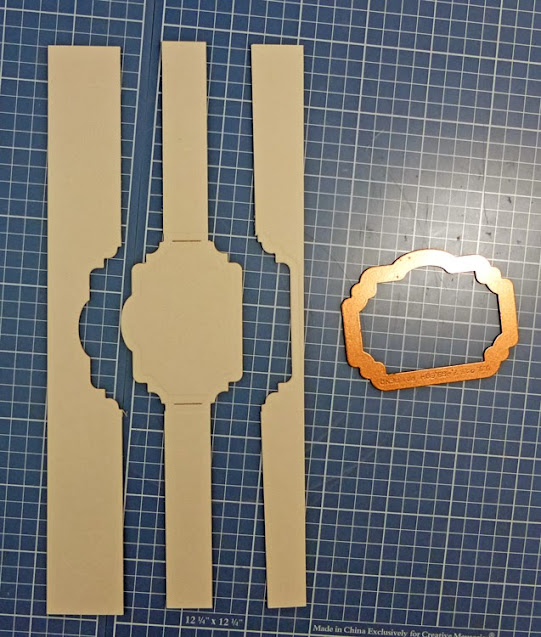
This is what it will look at once it's cut and embossed.  You'll notice the left and right sides are open ended.  This allows you to trim your "band" any length you want.
3.  To make the band cuts, I put the cardstock in my trimmer and lined it up to the die cut lines.  You could also do this step freehand or even with decorative scissors.
This is what it will look like after all four cuts are made.
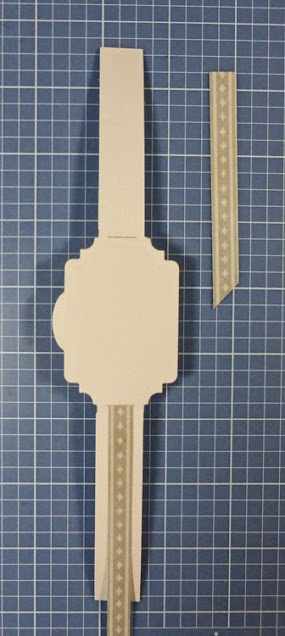
 4.  Next I trimmed 2 pattern paper pieces and slipped them inside the pre-cut openings.  Note, you can also use ribbon as I have shown on my second project below.
5.  Once the accent paper is in place, I taped the ends down in the back.  Then I wrapped the entire band around my bottle/gift card holder, trimmed any excess and glued the ends together.
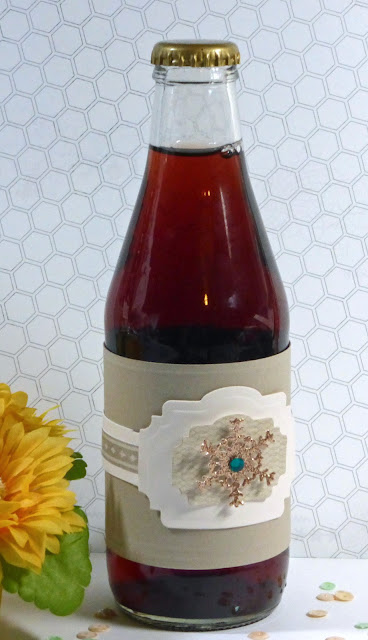
Here's a close up picture of the bottle.  For the second layer, I die cut and embossed pattern paper with Die #1 and turned it into a nesting label shape instead of a band by cutting the sides.


Here's a quick tutorial on how I made the gift cardholder:
1. Trim cardstock 8 3/4" by 4 1/4"
2.  Score lines at the 3" and 6" marks
3. For the diagonal opening, trim off the top right corner.  I made my cut marks 1/2" in from the left at the top and 1" up from the bottom.
4.  Add adhesive along the bottom and up the short side (I used 1/8" Scor-Tape).  This will allow a gift card to fit inside.
 Here's a picture of the ensemble with the belly band slipped off.

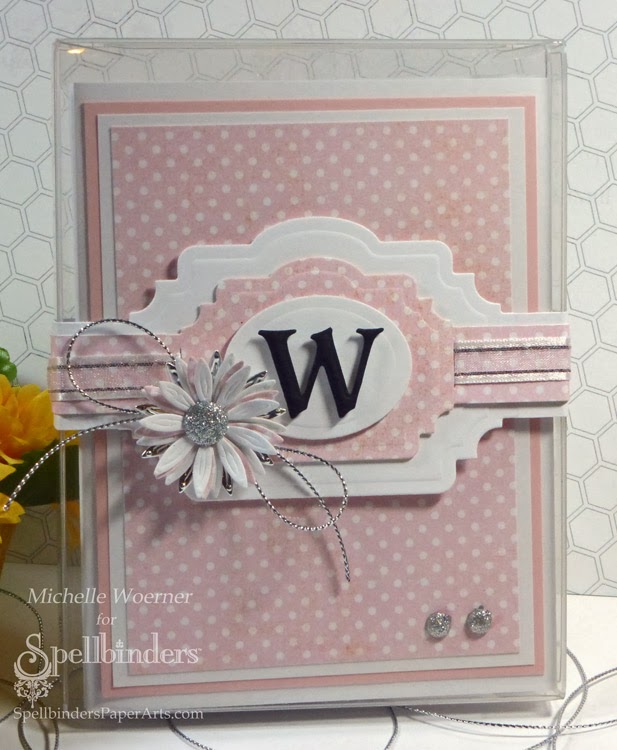
Here is another project I made with the Belly Band One die templates.  I decorated a clear stationery box with two nesting bands with the top layer threaded with ribbon.  I accented the layers with an oval from Classic Ovals SM, a letter from the Font One Uppercase, and flowers from the Blooms Four set.
Thank you for stopping by and have a great day!